This post contains affiliate links. If you purchase through our links, we may earn a small commission at no extra cost to you.
How to Build an Organic Garden From Scratch: A Beginner’s Guide
Your grocery store’s “fresh” tomatoes were picked green, gassed with ethylene, and trucked hundreds of miles before they hit the shelf. You deserve better — and so does your food.
Building your own organic garden changes that equation completely. No synthetic pesticides. No mystery fertilizers. Just real food grown the way it’s supposed to be grown.
By the end of this guide, you’ll know exactly where to put your garden, how to build rich soil from scratch, which plants to start with, how to stop pests without chemicals, and which 7 products are actually worth buying your first season.
- How to choose a garden location that actually works
- What makes organic soil productive from day one
- Which beginner vegetables give the easiest early wins
- How to prevent pests without harsh chemicals
- Which 7 products are worth buying your first season
Your 10-Step Organic Garden Checklist
Use this as your season-at-a-glance reference. Each step links to a full section below.
- Choose a sunny spot — aim for at least six hours of direct sunlight per day.
- Start small — one 4×4 or 4×8 bed is enough for a first season.
- Build the soil first — good compost and organic soil matter more than any tool.
- Pick beginner-friendly crops — tomatoes, greens, beans, herbs, and zucchini are reliable starters.
- Plant for your frost date — cool crops go in before last frost; warm crops go in after.
- Mulch right away — it saves water and cuts down on weeds immediately.
- Water deeply — soak the root zone instead of watering lightly every day.
- Use companion plants — marigolds, basil, and nasturtiums reduce pest pressure naturally.
- Feed the soil mid-season — compost, worm castings, and fish emulsion go a long way.
- Harvest often — regular picking keeps many crops producing longer.
Want the full version of each step? Use the table of contents above to jump to the section you need.
Why an Organic Garden Pays Off More Than You’d Expect
Most beginners assume organic gardening is harder. It’s actually simpler — once you understand the shift.
Synthetic fertilizers feed plants fast, but they skip the soil entirely. Broad-spray pesticides also wipe out beneficial insects along with the pests you were targeting — and now your garden depends on the spray to keep functioning.
An organic garden works differently. You build healthy soil first, choose plants that fit your space, and prevent problems before they start. The first season takes some attention. Every season after that gets easier.
There’s also a quality argument worth making. Produce harvested at peak ripeness — and eaten the same day — tastes better than anything picked early and shipped across the country.
According to the Rodale Institute, which runs the longest side-by-side organic and conventional farming trial in the U.S., organic systems can match or exceed conventional yields after a transition period — while improving soil health over time.
The cost math works too. A $3–5 seed packet can produce a surprising amount of food. One 4×8 raised bed can supply a meaningful share of your summer vegetables. Spend more on soil at the start, and you spend less fixing problems later.
“Spend more on soil at the start, and you’ll spend less fixing problems every season after.”
Bottom line: organic gardening rewards the patient. Start right, and the system works for you — not against you.
How to Plan Your First Organic Garden: Location, Size, and Layout
The single biggest beginner mistake is starting too big. An overwhelming garden gets neglected — and neglect turns into weeds, pests, and frustration fast.
Start with one manageable bed. Build confidence first. Expand later.
Pick a Location With Enough Sun to Actually Grow Food
Most vegetables need at least six hours of direct sunlight per day. Eight is even better. Walk your yard at different times on a clear day to see where the light actually lands — it’s often different from where you assume.
South-facing and west-facing spots get the best light in the northern hemisphere. Avoid low areas where water pools after rain. Soggy soil leads directly to root rot and fungal problems.
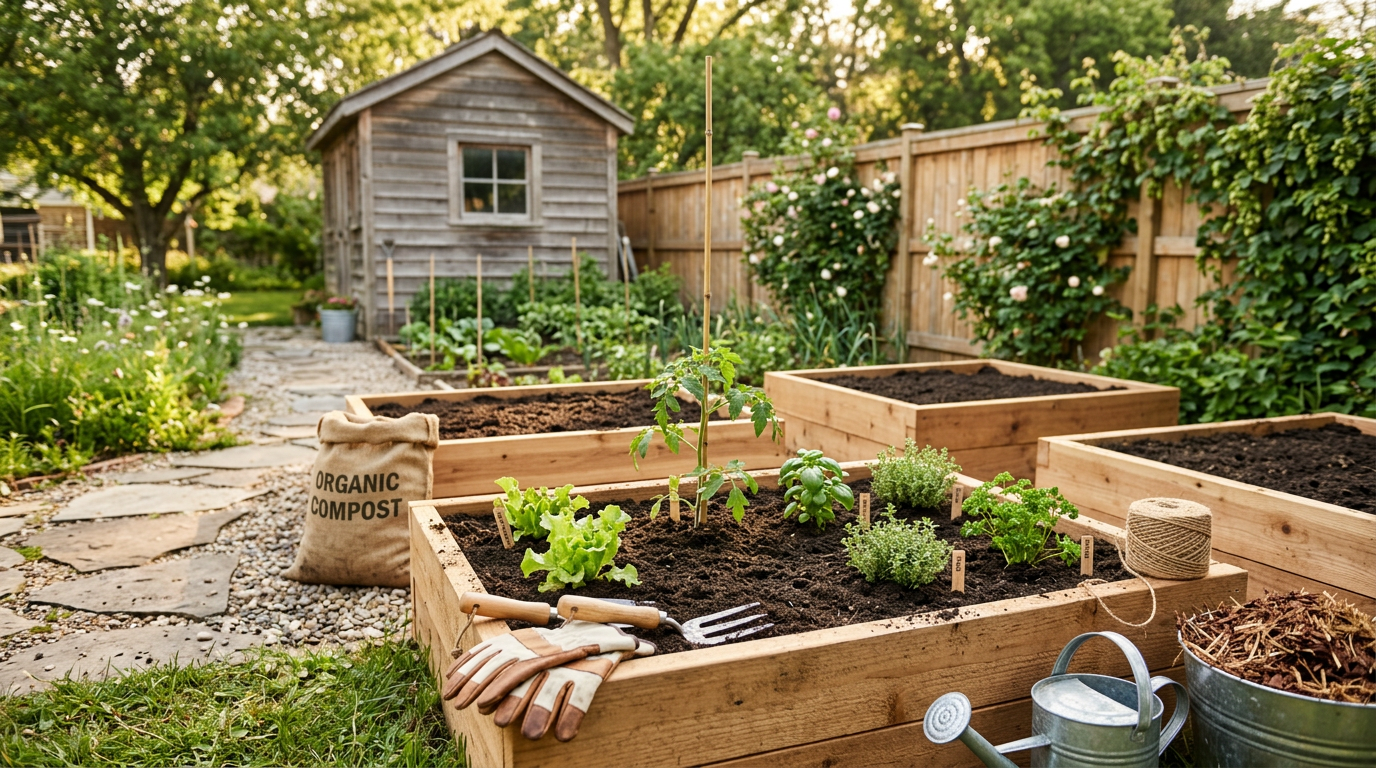
Raised Beds vs. In-Ground: Which Is Better for Beginners
Raised beds win for beginners — almost every time. You control the soil from day one. Drainage improves automatically. Weeds stay manageable. And the defined shape makes planning simple.
A cedar or pine raised bed kit is the fastest path to a clean, productive setup. Cedar costs more upfront but lasts 10–15 years without any treatment.
Layout Rules That Keep Your Garden Easy to Manage
Keep beds no wider than four feet. That lets you reach the center without stepping on the soil — and compacted soil slows root growth significantly. Leave 18–24 inches between beds so you can kneel, carry tools, and move freely.
If possible, run rows north to south. Taller plants are less likely to shade shorter ones that way.
Get the location and size right once, and every other decision in this guide gets easier.
How to Build Healthy Soil That Does the Hard Work for You
This is the part most gardening guides rush past. It’s also the part that determines whether your first season actually works.
Healthy soil isn’t just dirt. It’s a living system — full of microbes, fungi, worms, and organic matter that feed plants, hold moisture, and suppress disease. The core shift in organic gardening: stop feeding the plant; feed the soil instead.
What Healthy Garden Soil Looks Like (And How to Tell)
Good garden soil is dark, crumbly, and earthy-smelling. It holds moisture without staying soggy and stays loose enough for roots to move through easily. Many residential yards — especially around newer homes — need serious improvement before they can grow food well.
Grab a handful of your soil and squeeze it. Good soil holds its shape briefly, then crumbles when you poke it. If it stays in a hard clump or falls apart instantly, you need to amend before planting.
The Best Raised Bed Soil Mix for Beginners
For a new raised bed, start with roughly 60% topsoil, 30% compost, and 10% perlite or coarse sand for drainage. That ratio gives roots what they need from the very first planting. If you want to save time, buy a pre-blended organic garden soil instead.
Look for mixes certified by the Organic Materials Review Institute (OMRI) — that label means the ingredients meet organic production standards. (OMRI = a nonprofit that reviews products for use in organic farming.)
→ Shop OMRI-Listed Organic Potting Mix and Garden Soil
Compost: The One Amendment That Does Everything
Compost is decomposed organic matter — leaves, kitchen scraps, yard waste. It improves soil structure, adds nutrients, and feeds the beneficial microbial life that makes everything work. Adding 2–3 inches of finished compost each season is the single highest-impact habit in organic gardening.
You can make compost at home, buy it bagged, or source it locally. The method matters less than using it consistently — every season, without fail.
4 Organic Fertilizers Worth Using in Your First Season
Even great soil sometimes needs extra feeding during the season. Here are the four most useful options for beginners:
-
Worm castings
Gentle, nearly impossible to over-apply, and great for both nutrients and microbial activity. This is the safest all-purpose choice for beginners. -
Fish emulsion
Fast-acting and especially useful for leafy growth early in the season. It smells strong — but it works quickly. -
Kelp meal
Rich in micronutrients and helpful for root development and stress tolerance. Use it at planting time or early in the season. -
Bone meal
A slower phosphorus source used at planting time for flowering and fruiting crops like tomatoes and peppers.
→ Shop Organic Fertilizers: Worm Castings and Fish Emulsion
Invest in soil now. It’s the one thing that gets better every year you add to it — and it makes every other step in this guide easier.
The next section tells you exactly which vegetables give beginners the fastest, most satisfying wins. If you’ve ever planted something and had it fail on you, this is the section that changes that.
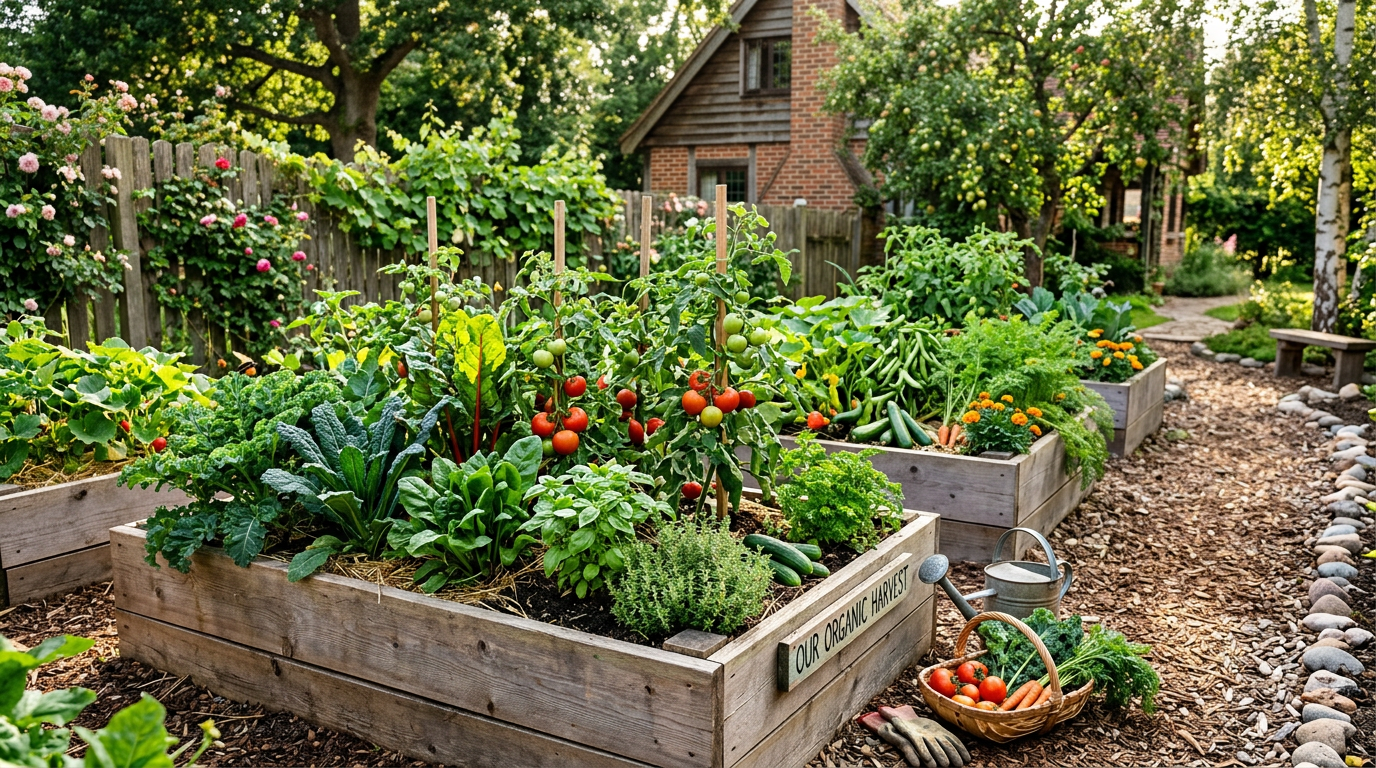
The Best Beginner Vegetables for an Organic Garden (And When to Plant Each)
Start with crops you actually want to eat. The fastest way to stay motivated is to harvest something you’re genuinely excited to cook. First-season success matters far more than variety.
6 Vegetables That Give Beginners the Fastest Wins
-
Tomatoes
High reward, high eating value. Choose disease-resistant varieties like Cherokee Purple or Brandywine for best results. -
Zucchini and summer squash
Famously productive and forgiving. One or two plants will produce more than most households can eat. -
Salad greens and lettuce
Quick-growing and great for fast, visible results. Start harvesting outer leaves in as little as 30 days. -
Green beans
Bush varieties are easy, productive, and need no staking. A great first-season confidence builder. -
Radishes
Ready in about a month. Use them to fill gaps between slower crops — they’re the ultimate beginner’s quick win. -
Herbs — basil, parsley, chives
High kitchen value, low space required. Also useful for companion planting throughout the garden.
Heirloom Seeds vs. Hybrid Seeds: Which Should You Buy First
Heirloom seeds are open-pollinated varieties you can save and replant each season. They’re often chosen for flavor and diversity. Hybrids can be excellent too — especially when bred for disease resistance.
For most beginners, a good heirloom seed variety pack is still the smarter first purchase. It gives you more options to test in one season and costs less than buying single packets one by one.
→ Shop Heirloom Seed Variety Packs
Planting Times: Your Two Most Important Reference Points
Your two key references are your USDA Plant Hardiness Zone and your last expected frost date. Cool-season crops — lettuce, spinach, peas, broccoli — go in 4–6 weeks before the last frost. Warm-season crops — tomatoes, peppers, squash, beans — go in after it, once the soil has warmed.
The Old Farmer’s Almanac offers a free frost date calculator by zip code. Bookmark it — you’ll use it every spring.
Plant what you’ll eat, time it to your frost date, and your first harvest will show up faster than you expect.
Natural Pest Control That Actually Works — No Harsh Chemicals Needed
Pests are part of gardening. They don’t have to take over. Organic pest control focuses on prevention first — not spraying everything and hoping for the best.
Companion Planting: Your First and Best Line of Defense
Companion planting uses one plant to help another — by repelling pests, attracting helpful insects, or improving growing conditions. These combinations are the most reliable for beginners:
-
Basil near tomatoes
Often used to discourage aphids and whiteflies. Plant one basil per two tomato plants. -
Marigolds throughout the garden
Attract beneficial insects and reduce some pest pressure. Plant freely between beds. -
Nasturtiums as trap crops
Attract aphids away from your vegetables. Let them do their job — don’t spray them. -
Dill and fennel near brassicas
Draw parasitic wasps that prey on caterpillars. A powerful passive defense. -
Beans near corn and squash
The classic Three Sisters combination — each plant supports the others.
Encourage These Beneficial Insects to Stay
Ladybugs, lacewings, parasitic wasps, and ground beetles are your allies. Encourage them by planting flowering herbs and leaving some mulch undisturbed. Avoid broad sprays — they wipe out your allies along with the pests.
“The fastest way to lose your beneficial insects is to spray for the pests they were already managing.”
When You Need to Spray: Use the Most Targeted Option First
Sometimes prevention isn’t enough. When you need to treat, start with the least disruptive option. Neem oil handles soft-bodied insects — aphids, spider mites, whiteflies. Insecticidal soap works for similar pests. Bt (Bacillus thuringiensis) — a naturally occurring bacteria — targets caterpillars specifically. (Bt = a naturally occurring soil bacteria approved for organic use.)
Apply all sprays in the evening. Bees are less active then, so you protect your pollinators while still treating the problem.
→ Shop Natural Pest Control Sprays and Neem Oil
Prevention, observation, and targeted treatment — in that order. That’s the whole organic pest control system.
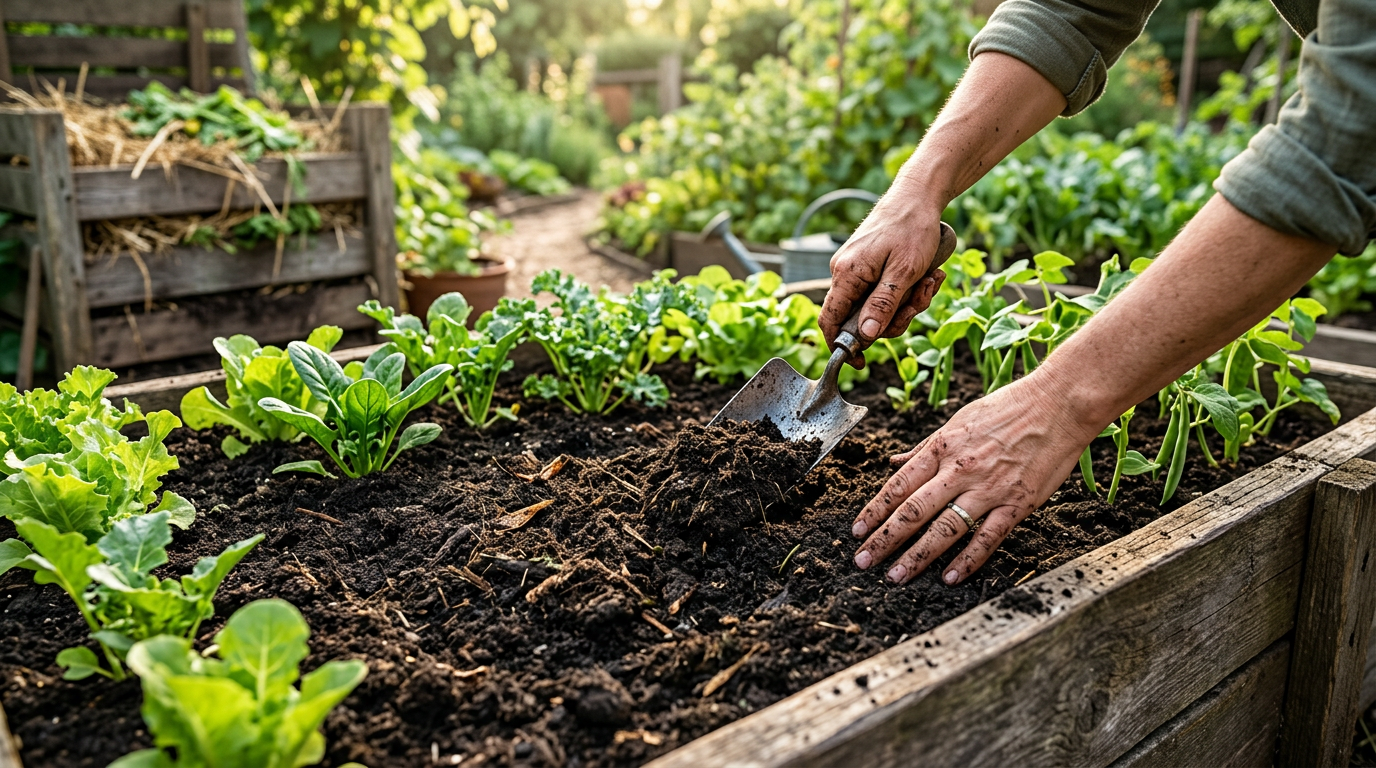
How to Water, Weed, and Maintain Your Organic Garden All Season
Good maintenance habits save you hours of problem-solving later. Most garden problems — disease, pests, poor yields — trace back to just a few avoidable mistakes.
Water Deeply, Not Daily
Most vegetables need about one inch of water per week — more in heat, less in cool weather. The most common beginner mistake is shallow, frequent watering. It keeps the top layer damp while deeper roots stay dry, which creates weak, surface-level root systems.
Instead, water deeply two to three times per week. Aim to soak moisture down six inches. Use the two-inch finger test: push your finger two inches into the soil — if it’s dry at that depth, water now.
Drip irrigation and soaker hoses are especially useful here. They send water straight to the root zone and keep foliage drier, which reduces disease pressure.
Mulch Once — Benefit All Season
A 2–3 inch layer of organic mulch — straw, wood chips, or shredded leaves — does three things at once. It reduces water loss, blocks weed germination, and improves soil as it breaks down. Apply it right after planting. Keep it a few inches away from plant stems to avoid trapping moisture against them.
Weed Early and Often (It Takes Less Time Than You Think)
The easiest weeds to manage are the tiny ones. A short weekly session with a hand cultivator — used shallowly between plants — prevents most weeds from ever becoming a problem. Dense planting and mulch do most of the ongoing work for you.
Use Crop Rotation to Protect Your Soil Year After Year
Growing the same plant family in the same bed every year drains the same nutrients and lets soil-borne diseases build up. Rotate crops so each family moves to a new bed each season. Think in four simple groups:
- Nightshades — tomatoes, peppers, eggplant
- Brassicas — broccoli, cabbage, kale
- Legumes — beans, peas
- Roots — carrots, beets, radishes
| Bed | Year 1 | Year 2 | Year 3 | Year 4 |
|---|---|---|---|---|
| Bed A | Nightshades | Legumes | Roots | Brassicas |
| Bed B | Legumes | Roots | Brassicas | Nightshades |
| Bed C | Roots | Brassicas | Nightshades | Legumes |
| Bed D | Brassicas | Nightshades | Legumes | Roots |
Water deep, mulch early, weed weekly, and rotate annually — four habits that prevent 80% of common garden problems.
Organic vs. Synthetic Inputs: What You’re Actually Putting in Your Soil
This table shows the real-world difference between conventional and organic approaches — and what each one does to your soil long-term.
| Input Type | Synthetic Conventional | Organic Alternative | Long-Term Soil Impact |
|---|---|---|---|
| Fertilizer | Synthetic NPK granules or liquid (e.g., Miracle-Gro) | Compost, worm castings, fish emulsion, kelp meal | Organic inputs build soil over time; synthetic inputs do not |
| Pest control | Synthetic pyrethroid or organophosphate sprays | Neem oil, insecticidal soap, Bt, companion planting | Targeted organic methods preserve beneficial insects |
| Weed control | Glyphosate (Roundup) or pre-emergent herbicides | Mulch, hand weeding, dense planting, vinegar spray | Mulch actively improves soil while blocking weeds |
| Soil amendment | Lime, peat moss, synthetic gypsum | Compost, biochar, aged manure, cover crops | Organic amendments improve structure and water retention |
| Disease control | Synthetic fungicides | Copper spray, baking soda solution, crop rotation, air circulation | Rotation and spacing prevent problems before they spread |
| Season cost (small garden) | $30–60 per year (ongoing) | $40–80 first year; $20–40 after that | Organic costs drop as soil improves each year |
In contrast to synthetic inputs, organic methods cost slightly more upfront — but they pay back through better soil and lower costs every year after.
4 Organic Gardening Mistakes That Kill First-Season Gardens
Most failed first gardens trace back to one of these four mistakes. Knowing them now saves you a full season of frustration.
Skipping Soil Prep and Hoping the Plants Compensate
Healthy plants start with healthy soil — always. Skipping soil preparation is the single most common reason a first organic garden struggles. Spend more of your starting budget on soil and compost than on plants or accessories.
Watering Too Often Instead of Deeply Enough
Overwatering causes more damage than most beginners expect. Roots need oxygen as well as moisture. Constantly wet soil invites disease and rots roots. Use the two-inch finger test before every watering session — especially in clay-heavy ground or rainy weather.
Crowding Plants Together to Fit More In
Spacing matters more than you think. Crowded plants compete for light, nutrients, and airflow. Poor airflow is one of the fastest ways to invite fungal disease. In your first season, give plants a little more room than the label calls for — not less.
Planting Tomatoes in the Same Spot Every Year
Repeating the same plant family in the same bed year after year allows soil-borne diseases — like early blight and fusarium wilt — to build up unchecked. Even a simple four-group rotation makes a noticeable difference over two seasons.
If you can only buy one tool for your first organic garden, choose a quality hand trowel with a comfortable grip. You’ll use it constantly — for planting, transplanting, spot-weeding, and light cultivating.
→ Shop Garden Tool Starter Sets
Avoid these four mistakes and your first season will be far more rewarding — and far less stressful — than most beginners expect.
You know the system now. The next section shows you the exact 7 products worth buying — and which ones beginners waste money on every year.
7 Organic Garden Products That Make the Biggest Difference
These are the products that move the needle when you’re building a chemical-free garden from scratch — chosen for practical impact, not filler.
Look for a 4×8 kit made from cedar or unfinished pine with sturdy corner hardware. That size gives you room to grow a useful crop mix without creating a year-one maintenance problem.
For beginners, convenience matters. A quality OMRI-listed mix removes the guesswork entirely. Look for compost-rich blends designed for raised beds or edible gardens — not decorative containers.
If you cook regularly and have yard waste, a compost bin pays for itself in better soil within one season. Tumbling bins are the easiest option for beginners — they speed up decomposition and make the process far less intimidating. See our how to start a zero waste kitchen for which scraps to add.
Choose a pack that covers the staple crops you’ll actually use — tomatoes, beans, greens, herbs, and squash. A variety pack costs less than buying individual packets and gives you more to experiment with in year one.
Worm castings are the safest all-purpose option — gentle, hard to overdo, and effective for most plants. Fish emulsion works faster and helps when plants need a quick mid-season boost. Together, they cover most small-garden feeding needs.
Keep one targeted product on hand before you need it — because you will need it. Neem oil handles the widest range of soft-bodied insects. Buy it early, and you’ll actually use it correctly when pest pressure shows up.
Skip the oversized sets filled with tools you’ll never touch. A solid trowel, hand cultivator, and bypass pruners cover almost everything a beginner does in a kitchen garden — season after season.
Frequently Asked Questions About Building an Organic Garden
Start with one small raised bed, fill it with quality organic soil and finished compost, and plant a handful of easy crops — tomatoes, greens, herbs, beans, or zucchini. Choose the sunniest spot you have, mulch after planting, and water deeply instead of lightly every day. Keep the first season simple, and aim for consistency over perfection. Use the 10-step checklist at the top of this guide to stay on track.
The best organic garden soil is loose, dark, and rich in organic matter — able to hold moisture without staying waterlogged. For raised beds, a mix of topsoil, finished compost, and perlite is a reliable starting point. Look for OMRI-certified blends to guarantee the ingredients meet organic standards. Add 2–3 inches of fresh compost each new season to keep it productive.
Use a layered approach: start with healthy soil and proper plant spacing, add companion plants like marigolds and basil, and check your garden regularly. When you do spot a problem, act quickly — hand-pick, use a strong water spray, then reach for neem oil or insecticidal soap if needed. The Rodale Institute offers free organic pest management guides if you need to identify a specific pest.
Yes — containers work well for tomatoes, herbs, peppers, greens, and bush beans as long as they’re large enough and have drainage holes. Use quality organic potting mix, check soil moisture more frequently than you would in a ground bed, and use vertical supports to save space. A single 5-gallon container can produce a full crop of cherry tomatoes or herbs through the summer.
Expect to spend $40–80 in your first season for soil, seeds, and basic tools. A raised bed kit adds $50–150 depending on material and size. However, costs drop significantly after year one — your soil improves, you save seeds, and you stop buying things you don’t need. Most beginners find their second-season cost drops to $20–40 for the entire garden.
A soil test isn’t required for beginners using a raised bed with fresh organic mix — but it’s worth doing if you’re planting in-ground or your crops keep underperforming. A basic test from your local cooperative extension service (usually $15–25) tells you your pH, nitrogen, phosphorus, and potassium levels. Fix what the test reveals, and your plants will respond immediately.